
Chocolate Pound Cake Recipe
There are few things in life more comforting than the smell of chocolate baking in the kitchen. And when it comes to classic desserts, a chocolate pound cake stands in a category all its own — rich, buttery, dense yet moist, and always ready to steal the spotlight at any gathering.
This isn’t just another chocolate cake recipe. This is the one — the one you’ll make again and again, the one that brings nostalgic smiles and quiet moments of “oh wow” after every bite.
Let’s dive into how to make the best chocolate pound cake you’ll ever bake — using simple ingredients, smart techniques, and a few expert secrets that make all the difference.
Why You’ll Love This Chocolate Pound Cake
This recipe has it all — deep cocoa flavor, melt-in-your-mouth texture, and a glossy chocolate glaze that makes it bakery-worthy without needing special skills.
Here’s why it’s your new go-to:
- Rich and balanced flavor: Not too sweet, not too bitter.
- Moist and tender: Thanks to butter, sour cream, and real cocoa.
- No fancy tools: Just a whisk, bowl, and loaf pan.
- Perfect for any occasion: From casual coffee chats to elegant dinner desserts.
According to The Journal of Food Science, the best chocolate desserts come from balancing fat, moisture, and cocoa solids — exactly what this recipe nails.
If you’re a cocoa perfectionist, you’ll love our guide on DIY Gourmet Chocs: How to Make Artisan Chocolate at Home.
What Makes a Pound Cake a “Pound Cake”?
Traditionally, pound cakes were made with a pound each of flour, butter, sugar, and eggs — hence the name. Over time, bakers adjusted ratios to make them lighter, moister, and more flavorful.
Our version adds cocoa powder, sour cream, and a touch of espresso powder to elevate the richness and depth of chocolate flavor.
According to Serious Eats’ cake structure research, balancing fat and flour ratios determines crumb texture — and sour cream’s acidity helps tenderize gluten for that perfectly soft slice.
You can learn how temperature affects chocolate in Why Chocolate Melts in Your Hands but Not in the Box — What You Need to Know.
Ingredients You’ll Need
Each ingredient here has a purpose — and a science behind it.
For the Cake
- 1 ½ cups (195g) all-purpose flour
- ¾ cup (75g) unsweetened cocoa powder (use high-quality, like Ghirardelli or Valrhona)
- 1 teaspoon baking powder
- ½ teaspoon salt
- 1 cup (225g) unsalted butter, room temperature
- 1 ¾ cups (350g) granulated sugar
- 4 large eggs, room temperature
- 1 teaspoon vanilla extract
- ½ cup (120ml) sour cream or full-fat Greek yogurt
- ½ cup (120ml) milk
- 1 teaspoon instant espresso powder (optional, but deepens chocolate flavor)
For the Glaze
- ½ cup (120ml) heavy cream
- 100g semisweet chocolate, chopped
- 1 tablespoon butter
Pro tip: Always use real cocoa, not chocolate drink mix. A Frontiers in Nutrition study shows that cocoa solids (not added sugars) are what carry antioxidants and flavor compounds.
See how cocoa quality impacts health in Is Dark Chocolate Really Healthy?.
Step-by-Step Instructions
Follow these steps and your cake will turn out perfect every single time.
Step 1: Prep Your Tools and Ingredients
Preheat your oven to 325°F (163°C). Grease a 9×5-inch loaf pan and line with parchment paper.
Bring eggs, butter, and milk to room temperature — cold ingredients can cause the batter to curdle.
Step 2: Cream Butter and Sugar
In a large bowl, beat butter and sugar together for 3–4 minutes until light and fluffy.
This step is key — it incorporates air that helps the cake rise even without much leavening.
A Food Chemistry Journal study found that creaming butter properly affects crumb softness more than flour type.
Step 3: Add Eggs One at a Time
Add the eggs one at a time, beating well after each. Stir in vanilla.
Make sure your eggs are room temperature — cold eggs can cause separation and uneven texture.
Step 4: Mix Dry Ingredients Separately
In another bowl, whisk together flour, cocoa, baking powder, and salt.
Use a fine mesh sieve if your cocoa is clumpy — smooth cocoa ensures even flavor and color.
Step 5: Combine Wet and Dry Mixtures
Alternately add dry ingredients and milk to the butter mixture, beginning and ending with dry. Mix gently — overmixing creates dense cakes.
Then fold in the sour cream (or yogurt) and espresso powder until smooth.
The batter should be thick, velvety, and glossy — a sign that your fats and liquids are perfectly balanced.
For more no-fail chocolate technique, see Easy No-Bake Chocolate Desserts for Every Occasion.
Step 6: Bake Slowly
Pour batter into the prepared pan. Tap once to remove air bubbles.
Bake for 60–70 minutes until a skewer inserted in the center comes out with just a few crumbs.
Don’t rush the bake — low and slow keeps moisture locked in.
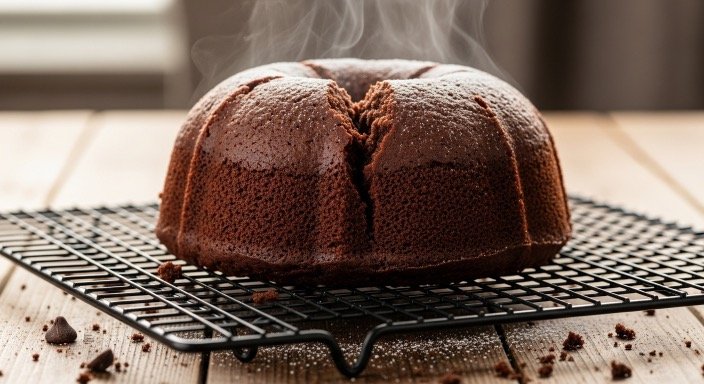
Step 7: Cool Completely
Chocolate Pound Cake Recipe
Chocolate Pound Cake Recipe
Cool in the pan for 15 minutes, then transfer to a rack. Let it cool completely before glazing — warm cake will melt your topping.
Step 8: Make the Glaze
In a small saucepan, heat cream until just steaming. Remove from heat, add chocolate and butter, and let sit for 2 minutes. Whisk until smooth and glossy.
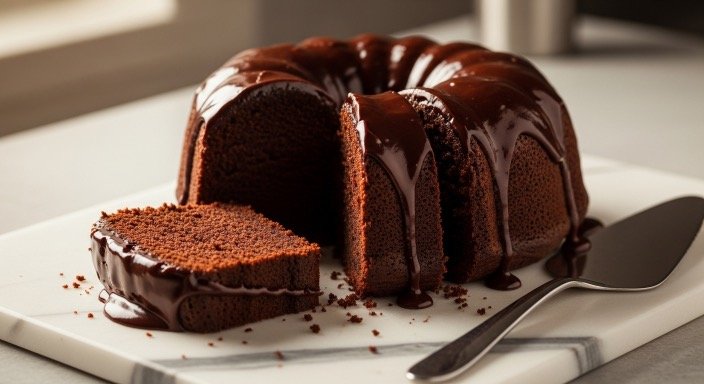
Pour over cooled cake and let it drip naturally — don’t overwork it.
Step 9: Slice and Serve
Chocolate Pound Cake Recipe
Chocolate Pound Cake Recipe
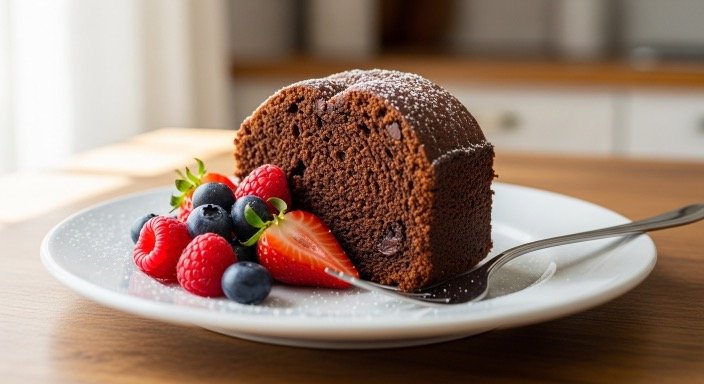
Once the glaze sets (about 30 minutes), slice thickly and serve. Pair with whipped cream, fresh berries, or coffee.
Variations to Try
- Marble Pound Cake: Swirl vanilla and chocolate batters together before baking.
- Mocha Pound Cake: Add 1 tablespoon espresso to the batter and glaze.
- Nutty Twist: Fold in chopped hazelnuts or almonds.
- Holiday Edition: Top with crushed peppermint for a festive finish.
For more seasonal chocolate inspiration, check Sip the Spirit: How to Make the Perfect Christmas Cocoa.
How to Store Your Chocolate Pound Cake
This cake stays moist for up to 5 days if wrapped well.
Short-Term Storage
- Store at room temperature in an airtight container.
- Avoid refrigerating — it can dry the cake.
Long-Term Storage
- Freeze slices for up to 2 months. Thaw at room temperature before serving.
A Fine Chocolate Industry Association study notes that proper wrapping prevents flavor loss due to fat bloom and moisture migration.
See our complete guide on How to Store Chocolate to Keep It Fresh: Tips from Experts.
Chocolate Pound Cake Recipe
Troubleshooting: Common Mistakes
| Problem | Possible Cause | Quick Fix |
| Cake too dense | Overmixing or cold ingredients | Mix gently, use room temp eggs & butter |
| Cake dry | Overbaked or oven too hot | Bake at 325°F, check at 60 min mark |
| Crumbly texture | Too little fat or sugar | Measure accurately, don’t reduce sugar |
| Dull glaze | Chocolate overheated | Melt gently and stir slowly |
If your chocolate ever seizes, check DIY Gourmet Chocs: How to Make Artisan Chocolate at Home for quick fixes.
Serving Ideas for Every Occasion
| Occasion | Serve With | Why It Works |
| Brunch | Berries + whipped cream | Light and elegant |
| Holidays | Peppermint glaze | Festive contrast |
| Dinner Party | Espresso drizzle | Sophisticated and bold |
| Everyday Treat | Dust of powdered sugar | Classic simplicity |
Fun Fact: Chocolate Pound Cake Was Once a Status Symbol
In the 1800s, cocoa was so expensive that baking with it signified wealth and hospitality.
A Smithsonian Magazine article notes that only upper-class families could afford chocolate desserts before industrial production made cocoa more accessible.
Read more fascinating cocoa history in Think You Know Chocolate? 20 Fun Facts That Will Surprise You.
Final Thought
This chocolate pound cake isn’t just another dessert — it’s a classic reborn.
Every bite is dense yet tender, buttery yet balanced, and unapologetically chocolate-forward.
Whether you serve it plain with coffee or dressed up with berries and ganache, it’s the kind of recipe that becomes a family tradition — the one your friends ask for again, the one that always works.
So go ahead — preheat your oven, grab your cocoa, and start baking.
You’re just a few steps away from the best chocolate pound cake you’ll ever make.
Chocolate Pound Cake Recipe
Discover more chocolate wisdom on ChocoTalks.com — where every bite tells a story.