
Chocs
There’s something almost magical about biting into a piece of silky, glossy chocolate that melts perfectly on your tongue. The kind that looks like it came straight from a boutique chocolatier — but what if you could make it yourself?
Welcome to the art of DIY gourmet chocs — a sweet, rewarding process where science meets creativity. Whether you’re experimenting for fun, crafting gifts, or dreaming of your own chocolate brand someday, learning to make artisan chocolate at home can transform your kitchen into a tiny chocolate lab of joy.
Why Make Your Own Artisan Chocolate?
Making chocolate at home isn’t just about indulgence — it’s about control, creativity, and quality. When you craft your own batch, you decide what goes in: the type of cocoa beans, the amount of sugar, the textures, and even the fillings.
According to PMC, the flavonoids in high-quality cocoa support antioxidant activity and cardiovascular health — benefits often lost in mass-produced bars filled with emulsifiers and preservatives.
For more on chocolate’s health advantages, see Is Dark Chocolate Really Healthy?.
And let’s face it — there’s something deeply satisfying about creating a glossy, rich bar from scratch, wrapping it beautifully, and sharing it with friends who say, “You made this?!”
Chocs
Understanding What Makes a Chocolate “Artisan”
Not every homemade chocolate is automatically “artisan.” True artisan chocs stand out because they balance craftsmanship, precision, and creativity.
Artisan chocolate focuses on:
- High-quality ingredients — single-origin or ethically sourced cocoa.
- Small-batch production for consistency and flavor depth.
- Natural add-ins — real nuts, fruits, spices, or herbs.
- Perfect tempering for shine and snap.
The flavor complexity of cocoa depends heavily on fermentation and roasting quality — something you can replicate even at home with care and patience.
To learn more about what affects chocolate flavor, check Dark vs. Milk Chocolate: The Surprising Health Differences You Need to Know.
Chocs
Ingredients You’ll Need
Creating gourmet chocs begins with choosing the right foundation.
1. Cocoa or Couverture Chocolate
Use real chocolate, not compound chocolate. Couverture chocolate (with high cocoa butter content) melts and sets beautifully.
Recommended brands: Callebaut, Valrhona, or Ghirardelli.
2. Cocoa Butter
This adds creaminess and that smooth “melt-in-the-mouth” quality. Avoid substitutes — they alter texture and flavor.
3. Sweeteners
Refined sugar, coconut sugar, or honey (for natural sweetness). Use sparingly — artisan chocs focus on flavor balance, not overpowering sweetness.
4. Add-Ins
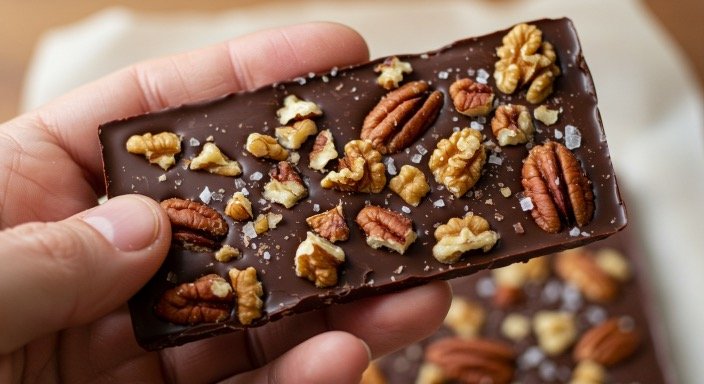
Crushed nuts, sea salt, candied ginger, freeze-dried raspberries, or chili flakes for a modern twist.
For creative ingredient pairings, explore Chocolate Graham Crackers — where texture and flavor pairing are key.
Tools for the Modern Chocolatier
Chocs
You don’t need a commercial setup — just precision and patience.
Basic tools:
- Double boiler or heatproof bowl + saucepan
- Digital thermometer
- Silicone molds or parchment paper
- Rubber spatula
- Cooling rack or marble slab
Fine chocolate industries recommend working in a room below 70°F (21°C) to avoid premature melting while molding.
Chocs
Step 1: Melting the Chocolate
Start by chopping your chocolate into small, even pieces.
- Double boiler method: Place chocolate in a heatproof bowl over gently simmering water.
- Microwave method: Use short bursts (15–20 seconds) and stir between intervals.
Your goal is to melt it smoothly without overheating. Chocolate burns easily — once it passes 120°F (49°C) for dark or 115°F (46°C) for milk/white, it loses its structure.
To understand why temperature matters, see Why Chocolate Melts in Your Hands but Not in the Box — What You Need to Know.
Chocs
Step 2: Tempering — The Secret to That Glossy Finish
Tempering is the key to turning melted chocolate into a shiny, snappy, professional-looking bar.
- Melt two-thirds of your chocolate to 115°F (dark) or 110°F (milk/white).
- Remove from heat and stir in the remaining one-third.
- Keep stirring until temperature cools to 88–90°F (dark) or 84–86°F (milk/white).
- Test a small spoonful — it should harden with a glossy, streak-free surface.
NIH study confirms that proper tempering enhances texture and preserves antioxidants in cocoa butter.
Step 3: Molding Your Chocs
Chocs
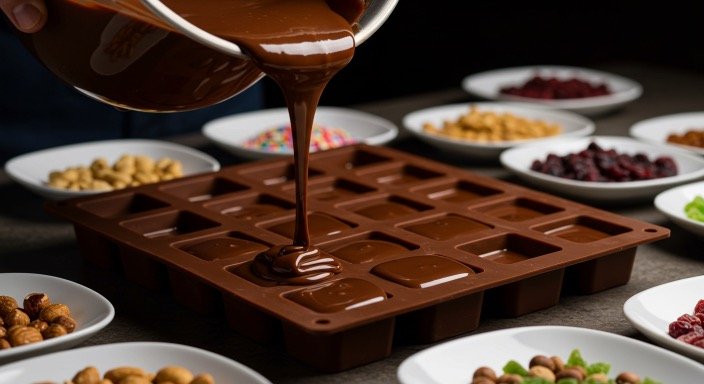
Pour the tempered chocolate into silicone molds or spread it on parchment paper for bark-style slabs.
Before it sets, sprinkle your chosen toppings — nuts, fruit, or edible flowers. Tap the mold gently to remove air bubbles.
Let it rest at room temperature for 1–2 hours or refrigerate for 15 minutes until set.
Once you master this, try something fun like Chocolate-Covered Strawberries for a romantic touch.
Insert Image 2 (after molding section):
Description: A person pouring tempered chocolate into silicone molds with toppings nearby.
ALT text: Pouring tempered chocolate into molds for homemade artisan chocs.
Step 4: Flavor Infusions (Optional but Irresistible)
Here’s where creativity meets craftsmanship. Infuse your chocolate with unique notes:
- Coffee or espresso for boldness.
- Vanilla bean or cinnamon for warmth.
- Orange zest or chili flakes for modern contrast.
- Mint oil for cool, refreshing balance.
Flavor complexity increases when aromatic oils are added during the cooling stage — not during melting.
Step 5: Cooling and Unmolding
Let your chocolates cool completely before handling. Rushing this step can cause fat bloom, the whitish coating that appears when cocoa butter rises to the surface.
If this happens, don’t worry — the taste remains perfect, and you can retemper to fix the appearance.
For long-term freshness, check How to Store Chocolate to Keep It Fresh: Tips from Experts.
Decorative Finishes Like a Pro
You can turn simple homemade chocs into works of art:
- Drizzle white or ruby chocolate for contrast.
- Dust with edible gold powder or cocoa.
- Sprinkle sea salt flakes for gourmet appeal.
- Pipe nut butter or caramel fillings before setting.
Professional chocolatiers use this artistry to create signature textures — something you can easily replicate at home.
See how the presentation elevates simple sweets in The Best Chocolate Chip Cookies.
Storage and Shelf Life
Homemade artisan chocs last up to 2 weeks at room temperature if stored in a cool, dry place. For longer storage, refrigerate them in an airtight container — but avoid humidity.
Wrapping each piece in foil or wax paper to maintain texture and prevent odor absorption.
Read the full storage science in How to Store Chocolate to Keep It Fresh: Tips from Experts.
Common Mistakes to Avoid
- Overheating the chocolate — leads to grainy texture.
- Adding water or steam — chocolate will seize immediately.
- Skipping tempering — causes dull, soft finish.
- Cold molds — make the surface uneven.
Discover why temperature balance is key in Why Chocolate Melts in Your Hands but Not in the Box — What You Need to Know.
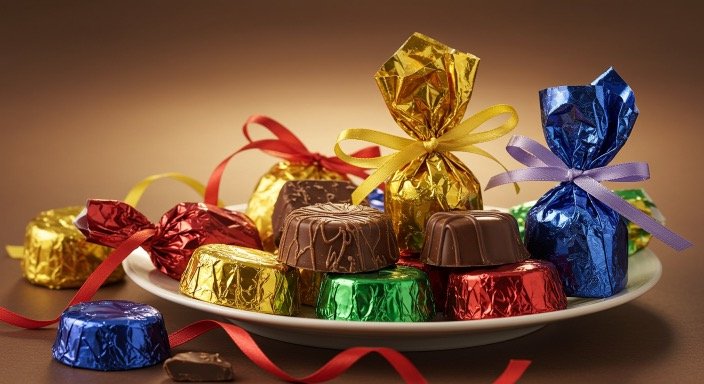
Fun Add-Ons: Making Gourmet Choc Gifts
Package your chocolates in parchment or decorative tins. Add ribbon, tags, and maybe a handwritten “crafted with love” note.
Presentation significantly enhances perceived flavor quality — even when the chocolate itself is identical.
For another beautiful homemade idea, see Sip the Spirit: How to Make the Perfect Christmas Cocoa.
Final Thoughts
Learning to make DIY gourmet chocs is more than a kitchen experiment — it’s a form of edible art. From the first melt to the final shine, every step teaches patience, precision, and appreciation for one of life’s greatest pleasures: chocolate.
Once you master tempering and flavor balancing, the possibilities are endless — spiced truffles, nut clusters, filled pralines, and beyond.
So next time you crave something sweet, skip the store-bought bar and craft your own masterpiece. You’ll not only taste the difference — you’ll feel it in every bite.
Continue your chocolate-making journey with Chocolate-Covered Strawberries: Simple Elegance You Can Taste.
Chocs
Discover more chocolate wisdom on ChocoTalks.com
where every bite tells a story.