
Some cakes are delicious.
Some cakes are cute.
And then there are cakes that make people smile the moment they see them.
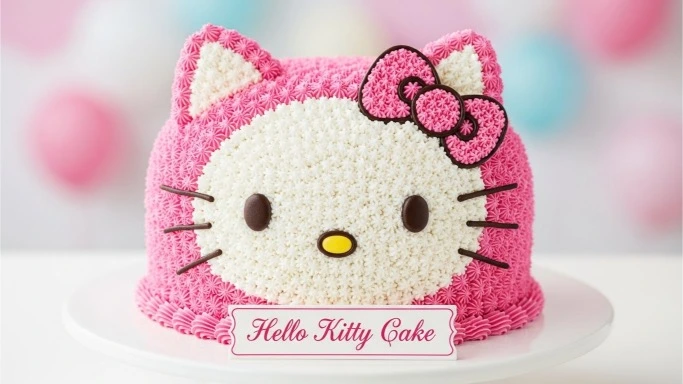
A Hello Kitty cake belongs firmly in that last category. Before the knife ever touches the frosting, before the first bite is taken, it already does its job—it makes people happy.
That’s the magic of this cake. It’s playful without being childish. Sweet without being over-the-top. And best of all, it’s absolutely doable at home, even if you’re not a professional baker.
This guide walks you through how to make a Hello Kitty cake that looks joyful, tastes amazing, and feels fun from start to finish.
Why a Hello Kitty Cake Is Always a Crowd-Pleaser
There’s something universal about Hello Kitty.
It works for:
- Kids’ birthday parties
- Teen celebrations
- Baby showers
- Nostalgic adults who grew up loving cute characters
The design is instantly recognizable. The colors are cheerful. And the overall vibe is warm, friendly, and comforting.
Unlike complicated sculpted cakes, a Hello Kitty cake focuses more on clean shapes, simple colors, and expressive details—which makes it much more approachable for home bakers.
Choosing the Right Cake Base
Before we talk about decoration, let’s talk flavor. A great design still needs a great cake underneath.
Best Cake Flavors for a Hello Kitty Cake
- Vanilla cake (classic and flexible)
- Chocolate cake (rich and crowd-friendly)
- Marble cake (perfect for visual contrast)
- Strawberry or vanilla-strawberry combo
Tools You’ll Need (Nothing Fancy)
You don’t need professional equipment.
Here’s what helps:
- Round or sheet cake pan
- Parchment paper
- Offset spatula or butter knife
- Piping bags or zip-top bags
- Small round piping tip (optional)
That’s it.
Step 1: Bake the Cake and Let It Cool Completely
Bake your cake according to your chosen recipe.
Important rule:
Do not decorate a warm cake.
Let it cool fully. Warm cakes cause:
- Melting frosting
- Sliding decorations
- Smudged details
Cooling sets the stage for clean lines and happy results.
Step 2: Shape the Cake (Keep It Simple)
You have two easy options:
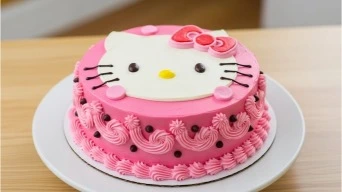
Option 1: Round Face Cake
- Use one or two round cakes
- Keep the shape clean and simple
Option 2: Sheet Cake Design
- Draw the Hello Kitty face on top
- Decorate flat (great for beginners)
You don’t need to carve complicated shapes. The design comes from the frosting, not the structure.
For inspiration, ChocoTalk.com often recommends browsing simple character cake layouts before starting.
Step 3: Apply a Smooth Base Frosting
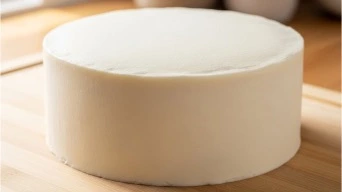
Use a light-colored frosting—usually white or pale pink.
Spread evenly:
- Top first
- Then sides
Don’t stress about perfection yet. This is your base layer.
According to Food Network’s frosting tips, smooth frosting improves how decorations sit on top and keeps colors clean.
Step 4: Bring Hello Kitty to Life With Simple Details
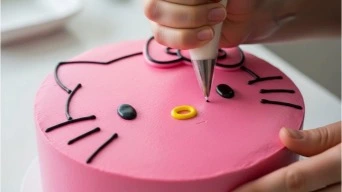
This is where the cake really starts to smile.
Key Features to Add
- Black eyes (small ovals)
- Yellow oval nose
- Whiskers (thin lines)
- Bow (pink or red, on one ear)
Use:
- Black frosting or melted chocolate for outlines
- Pink frosting for the bow
- Yellow fondant or frosting for the nose
Less is more here. Clean lines matter more than tiny details.
Step 5: Add Chocolate Elements (Optional but Delicious)
Chocolate adds depth and flavor without overpowering the cute design.
Ideas:
- Chocolate sponge base
- Chocolate ganache drip (kept subtle)
- Chocolate accents for outlines
Step 6: Final Touches That Make It Feel Special
Small details make a big difference.
Consider:
- Light blush on cheeks (tiny pink circles)
- A piped border around the cake
- Sprinkles kept to a minimum
- A clean cake board
Stop early. Overdecorating can distract from the character’s charm.
Common Mistakes (And How to Avoid Them)
Frosting Smears
Cake wasn’t cool enough. Always wait.
Uneven Eyes or Whiskers
Lightly sketch guidelines with a toothpick first.
Colors Bleeding
Use gel food coloring, not liquid.
Cake Feels Too Sweet
Balance with chocolate or a less sweet frosting base.
The FDA food coloring guidelines explain why gel colors perform better in frosting.
Making the Cake Ahead of Time
Yes, you can prep in stages.
Smart Timeline
- Day 1: Bake and cool cake
- Day 2: Frost and decorate
Wrap the unfrosted cake tightly and store at room temperature.
This approach keeps the process relaxed and enjoyable.
When Is a Hello Kitty Cake Perfect?
Honestly? Anytime joy is the goal.
It’s perfect for:
- Birthday parties
- First celebrations
- Cute-themed gatherings
- Surprise desserts
It’s not about being fancy. It’s about creating a moment.
Short FAQ: Hello Kitty Cake
Do I need fondant?
No. Buttercream works beautifully.
Can I make this cake chocolate?
Absolutely. Chocolate bases are very popular.
Is this cake beginner-friendly?
Yes, especially with a sheet cake design.
Can I make it dairy-free?
Yes. Use dairy-free butter and plant-based milk.
Final Thoughts: A Cake That Brings Instant Joy
A Hello Kitty cake isn’t just dessert. It’s an experience. It brings smiles before the first bite and memories long after the last slice is gone.
With a simple base, thoughtful details, and a little patience, you can create a cake that feels joyful, personal, and genuinely fun to make.And if you love baking treats that blend sweetness, creativity, and chocolate know-how, you’ll feel right at home exploring more recipes and ideas on ChocoTalk.com—where every cake tells a story.
Want to make a delicious chocolate cake? click here