
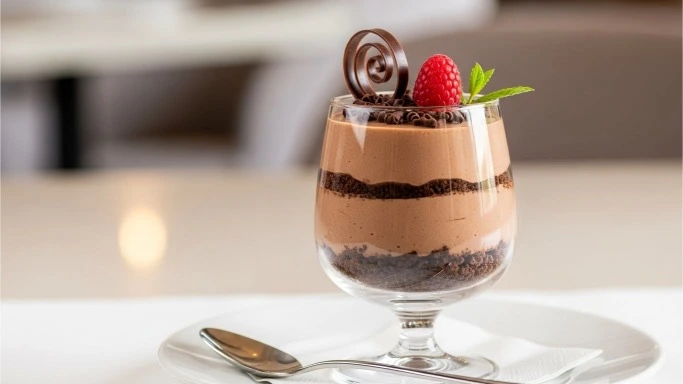
There’s something quietly impressive about a chocolate layered dessert. It doesn’t shout. It doesn’t rush. It sits there with confidence — smooth layers, rich chocolate, and just enough elegance to feel special without feeling fussy.
The good news? You don’t need pastry school or fancy equipment to make one at home. With the right structure and a little patience, a layered chocolate dessert can be one of the most rewarding treats you ever serve — especially for holidays, dinner parties, or moments when you want dessert to feel intentional.
Let’s walk through it step by step, starting with a detailed, approachable recipe, then diving into tips, variations, and common mistakes to avoid.
The Elegant Chocolate Layered Dessert (Step-by-Step Recipe)
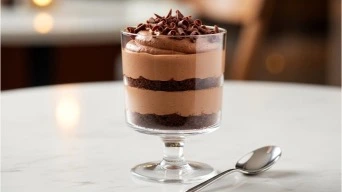
This recipe creates a balanced, three-layer chocolate dessert that looks refined but stays beginner-friendly.
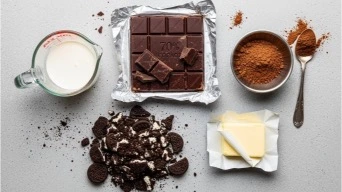
What You’ll Need to Make an Elegant Chocolate Layered Dessert
Layer 1 – Chocolate Crumb Base
- 1½ cups chocolate cookies or chocolate biscuits, finely crushed
- 6 tablespoons melted butter
Layer 2 – Chocolate Cream Layer
- 8 oz dark or semi-sweet chocolate
- 1 cup heavy cream
- 2 tablespoons sugar (adjust to taste)
- 1 teaspoon vanilla extract
Layer 3 – Light Chocolate Mousse
- 4 oz dark chocolate
- ¾ cup heavy cream
- 1 tablespoon cocoa powder
Step 1: Prepare the Chocolate Base for the Elegant Chocolate Layered Dessert
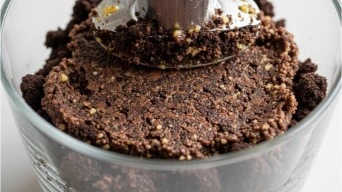
Mix the crushed chocolate cookies with melted butter until evenly coated. The texture should feel like damp sand — not oily, not dry.
Press the mixture firmly into the bottom of a glass dish or individual dessert cups. Use the back of a spoon or the bottom of a glass to create a smooth, even layer.
Place in the refrigerator for 15–20 minutes to set.
Why this works: A firm base gives structure and keeps the layers from blending — a key detail in elegant desserts.
Step 2: Make the Chocolate Cream Layer
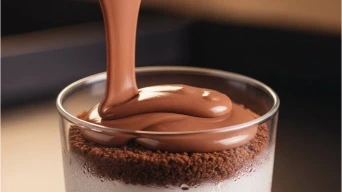
Heat the cream gently until warm (not boiling). Pour it over chopped chocolate and let it sit for one minute, then stir slowly until smooth and glossy.
Add sugar and vanilla. Taste and adjust sweetness.
Pour this layer gently over the chilled base. Tilt the dish slightly to help it spread evenly without disturbing the bottom layer.
Refrigerate for 20–30 minutes until softly set.
If you’re new to melting chocolate, this guide helps avoid grainy texture: How to Melt Chocolate Chips Easily.
Step 3: Whip the Light Chocolate Mousse
Melt the remaining chocolate and let it cool slightly.
Whip the cream until soft peaks form, then gently fold in cocoa powder and melted chocolate. Move slowly — this keeps the mousse airy and light.
Spoon the mousse on top of the set chocolate cream layer. Smooth the surface or create gentle swirls for a natural finish.
Chill for at least 2 hours, ideally overnight.
Why Chocolate Layered Desserts Feel So Elegant
Layered desserts work because they engage contrast:
- Creamy vs crumbly
- Light vs rich
- Sweet vs deep cocoa
Each bite unfolds instead of overwhelming. That’s why layered chocolate desserts often feel more refined than a single dense cake.
If you enjoy understanding chocolate structure, this foundational guide pairs well with this recipe: Chocolate Liquor Explained: A Simple Guide for Chocolate Lovers
Choosing the Right Chocolate for Layered Desserts
Chocolate choice matters more here than in most recipes.
Best options:
- Dark chocolate (60–70%) for depth
- Semi-sweet for balance
Avoid:
- Compound chocolate (waxy texture)
- Overly sweet milk chocolate for main layers
For a deeper comparison, see: Regular Chocolate vs Baking Chocolate – All You Need to Know.
Make It Holiday-Ready (Valentine’s & Celebrations)
This dessert helps itself to seasonal flair:
- Valentine’s Day: add raspberry coulis between layers
- Holidays: sprinkle shaved chocolate or cocoa nibs on top
- Elegant dinners: serve in clear glasses with gold spoons
For a romantic pairing idea, see: Valentine and Chocolate: A Love Story That Never Gets Old.
Common Mistakes (And How to Avoid Them)
Layers mixing together
→ Chill each layer fully before adding the next.
Chocolate turning grainy
→ Overheated chocolate or water contact. Melt gently.
Dessert tasting too heavy
→ Balance rich layers with at least one light mousse or whipped layer.
Storage & Make-Ahead Tips
- Keeps well refrigerated for 2–3 days
- Do not freeze — texture suffers
- Cover tightly to prevent fridge odors
FAQ: Chocolate Layered Desserts
Can I make this without baking?
Yes — this recipe is fully no-bake.
Can I use milk chocolate instead?
You can, but reduce sugar elsewhere to avoid excess sweetness.
Is this dessert very rich?
Balanced richness — each layer plays a role.
Can I serve it in a large dish instead of cups?
Absolutely. Glass dishes work beautifully.
Why This Dessert Works Every Time
An elegant chocolate layered dessert isn’t about complexity. It’s about patience, contrast, and respect for chocolate.
You don’t need perfection. You need intention.
When you give each layer space to shine, the result feels thoughtful — and that’s what guests remember.
Our Authority Sources
- International Cocoa Organization (ICCO) – Cocoa quality, chocolate composition, and processing standards
- FDA (U.S. Food & Drug Administration) – Chocolate ingredient definitions and food safety guidelines
- Harvard T.H. Chan School of Public Health – Chocolate, cocoa compounds, and ingredient transparency