
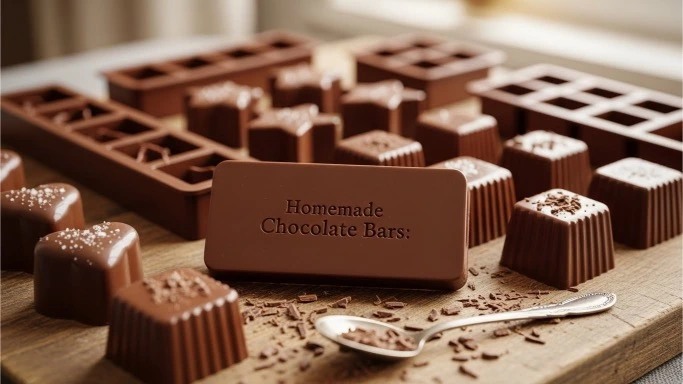
Making your own chocolate bars at home sounds impressive—but in reality, it’s one of the most satisfying chocolate projects you can try, even as a beginner.
You don’t need factory machines.
You don’t need rare ingredients.
You don’t even need years of baking experience.
What you do need is a basic understanding of chocolate, gentle heat, and a little patience.
In this guide, you’ll learn how to make chocolate bars at home step by step. We’ll start with a clear, fun, well-explained recipe right after this introduction, then move into techniques, variations, common mistakes, and realistic expectations—so your chocolate bars actually turn out smooth, snappy, and delicious.
Easy Homemade Chocolate Bars (Step-by-Step Recipe)
This recipe is designed for real home kitchens, not professional labs. You can make excellent chocolate bars with store-bought chocolate—and later level up if you want.
What This Recipe Makes
- Smooth, glossy chocolate bars
- Customizable flavors and add-ins
- Bars perfect for snacking, gifting, or baking
Ingredients (Keep It Simple)
- High-quality chocolate (dark, milk, or white)
- Optional add-ins:
- Nuts (almonds, hazelnuts, pistachios)
- Dried fruit
- Sea salt
- Crushed cookies
- Spices (cinnamon, chili, cardamom)
Tip: Choose chocolate with cocoa butter listed in the ingredients. This matters more than brand name.
If you’re unsure which type to start with, our article White Chocolate vs Milk Chocolate: Which Is Better for Baking? helps you choose based on flavor and behavior.
Tools You’ll Need
- Heatproof bowl
- Saucepan (for a double boiler) or microwave
- Spatula
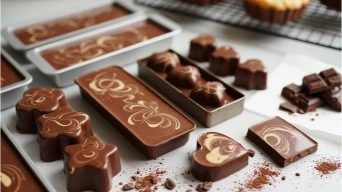
- Chocolate bar mold (silicone or polycarbonate)
No mold? A parchment-lined loaf pan works in a pinch.
Step 1: Chop and Melt the Chocolate Gently
Break or chop your chocolate into small, even pieces.
Melt it using one of these methods:
Double Boiler (Best Control)
- Place chocolate in a bowl over gently simmering water
- Stir slowly
- Remove from heat while a few pieces remain
Microwave (Faster, Needs Attention)
- Heat in 20–30 second bursts
- Stir between each round
- Stop early and let residual heat finish melting
Chocolate hates rushing.
Low heat = smooth results.
If this step feels intimidating, How to Melt Chocolate Chips Easily walks through it visually and calmly.
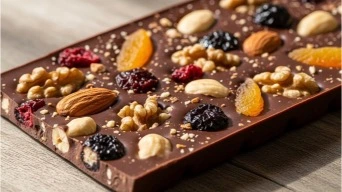
Step 2: Customize Your Chocolate (Optional but Fun)
Once melted, this is where homemade bars shine.
Stir in:
- A pinch of flaky sea salt
- Toasted nuts
- Dried fruit
- A dash of spice
Keep add-ins small and dry. Too much moisture can ruin texture.
Step 3: Pour into Molds
Carefully pour melted chocolate into your mold.
- Tap the mold gently on the counter to release air bubbles
- Use a spatula to level the surface
This step alone makes homemade bars look professional.
Step 4: Let the Chocolate Set
You have two options:
Room Temperature (Best for Texture)
- Let bars set undisturbed for 1–2 hours
Refrigerator (Faster)
- Chill for 15–20 minutes
- Don’t freeze unless necessary
Once firm, gently pop the bars out.
That’s it. You’ve made chocolate bars at home.
Why Homemade Chocolate Bars Taste Different (In a Good Way)
Homemade bars:
- Taste fresher
- Highlight cocoa butter more clearly
- Feel more personal
You’re controlling:
- Sweetness
- Texture
- Flavor balance
Understanding cocoa butter helps explain this difference. What Is Cocoa Butter? Benefits & Uses for Better Health on ChocoTalks.com explains why cocoa butter affects snap, shine, and melt.
Should You Temper Chocolate for Homemade Bars?
Short answer: optional—but helpful.
What Tempering Does
- Creates a glossy finish
- Gives chocolate a clean snap
- Helps bars resist melting at room temperature
When You Can Skip It
- Casual snacking bars
- Refrigerated storage
- Beginner projects
Common Problems (And Easy Fixes)
Chocolate Looks Dull
- It wasn’t tempered
- Still tastes fine
Chocolate Feels Soft
- Cocoa butter ratio is low
- Store chilled
Chocolate Seized
- Moisture got in
- Start fresh—sad but true
Even tiny drops of water can cause chocolate to seize.
Milk, Dark, or White Chocolate: Which Is Best?
This depends on your goal.
Dark Chocolate
- Bold flavor
- Less sweet
- Best for purists
Milk Chocolate
- Balanced sweetness
- Crowd-pleasing
- Easy to work with
White Chocolate
- Creamy and sweet
- Needs gentle heat
- Great for add-ins
If you enjoy white chocolate projects, our article What Is White Chocolate and How Is It Made gives helpful context.
Are Homemade Chocolate Bars Healthier?
They can be—but not automatically.
Homemade bars:
- Let you control sugar
- Avoid unnecessary additives
- Still contain fat and calories
According to Harvard T.H. Chan School of Public Health, most chocolate benefits come from cocoa solids—meaning dark chocolate offers more nutritional value than white.
For balance and honesty, Reasons Why Chocolate Is Bad for You explains where moderation matters.
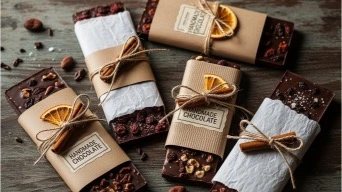
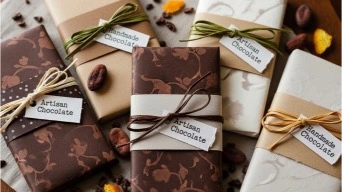
Flavor Ideas You Can Try at Home
Once you’ve mastered the basics, experiment.
- Dark chocolate + sea salt
- Milk chocolate + hazelnuts
- White chocolate + cranberries
- Dark chocolate + chili
Homemade bars are meant to reflect your taste.
Storage Tips for Homemade Chocolate Bars
- Store in an airtight container
- Keep cool and dry
- Avoid direct sunlight
Homemade bars last 2–3 weeks if stored properly.
People Also Ask: Chocolate Bars at Home
Can I make chocolate bars without molds?
Yes. Use parchment-lined pans and cut later.
Do I need special chocolate?
No—but quality chocolate gives better results.
Why are my bars streaky?
They weren’t tempered. Cosmetic issue only.
Can I add fillings?
Simple add-ins are best. Liquid fillings are tricky.
Is tempering required?
No, but it improves appearance and snap.
Can kids help?
Yes, with adult supervision for melting.
Is homemade chocolate cheaper?
Not always—but it’s customizable.
Can I sell homemade chocolate bars?
Food laws vary. Check local regulations.
Final Thoughts
Learning how to make chocolate bars at home isn’t about chasing perfection.
It’s about:
- Understanding chocolate
- Slowing down
- Creating something intentional
Your first bars don’t need to look factory-perfect to be satisfying.And if you enjoy chocolate explained clearly—without pressure or hype—you’ll find many more guides, recipes, and techniques on ChocoTalks.com, where chocolate is always treated with curiosity and care.